Portfolio #1
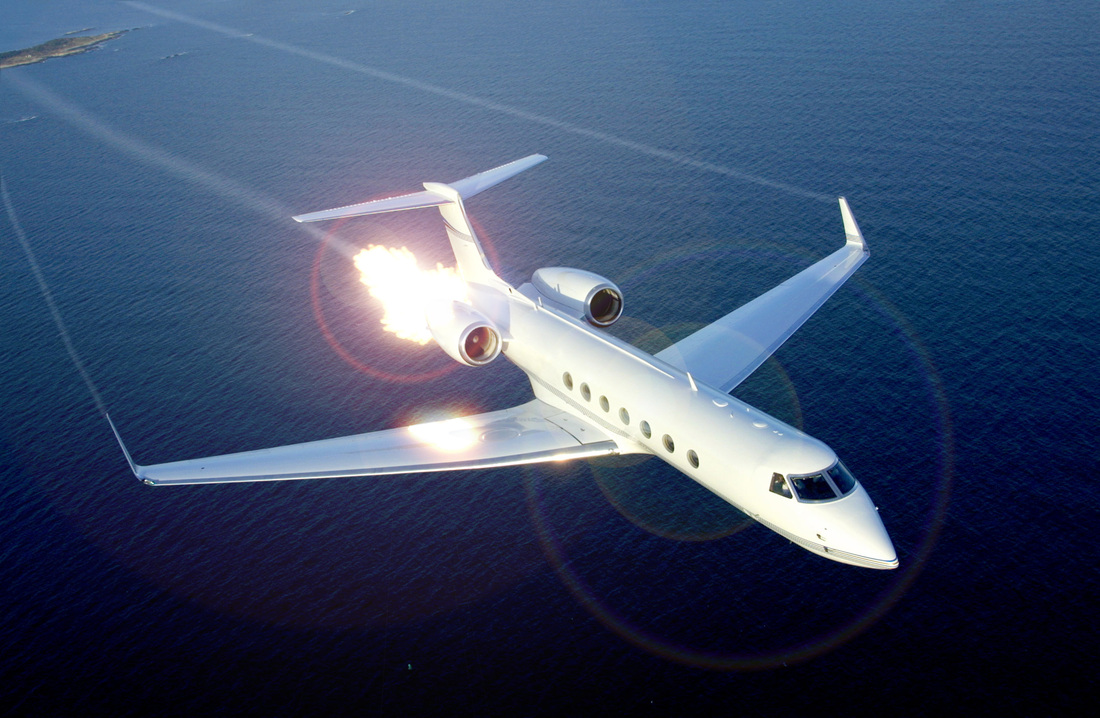
First an image of a muzzle flash on a black background was found. The Add blending mode was used to remove the black. The engine was then masked out and placed over the flash. A reflection of the flash was placed on the engine and the opacity was changed to make it look like a reflection. The same technique was used for the wing. To create the wingtip vortexes and the smoke from the engine a small dot of white was placed and the smudge tool, strength set to 95%, was used to drag the streams off screen. The blur and eraser tools were used for finalizing the streams. For the lens flare, a black solid was created. The area where the flash is was marked then Filter/Render/Lens Flare was used. To get rid of the black behind the lens flare, the Add blending mode was used.
Portfolio #2
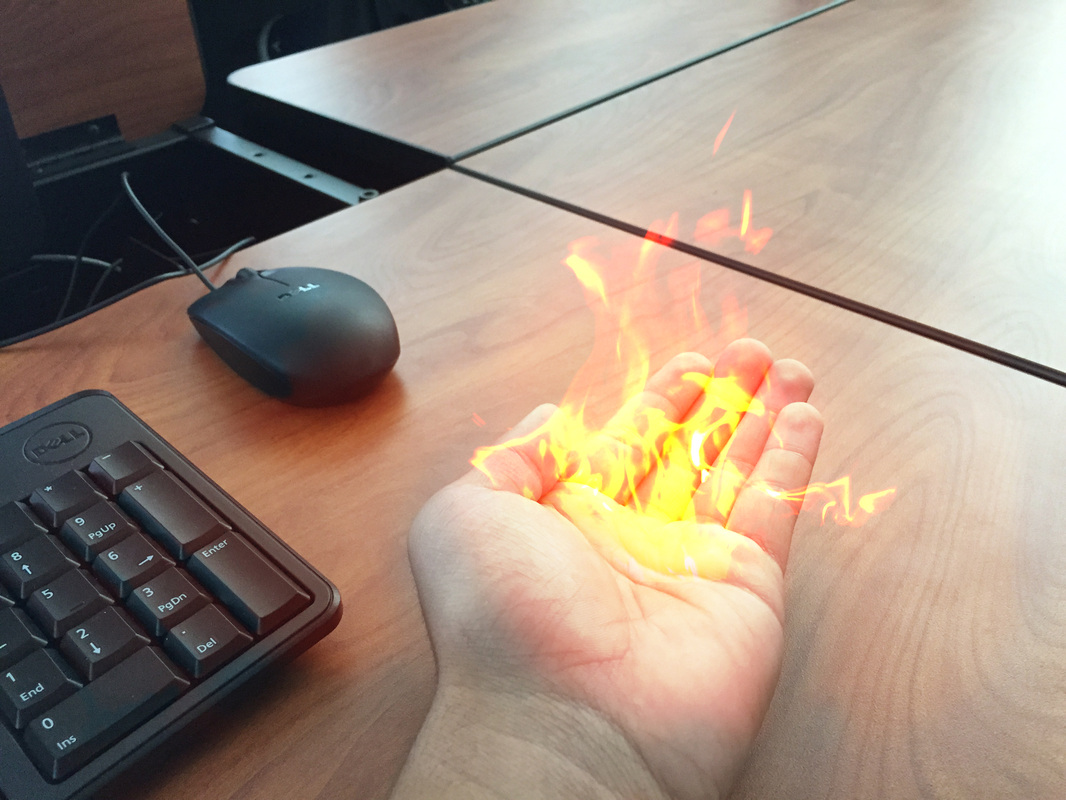
First a picture of my hand and a picture of fire was obtained. The blending mode "Screen" was used to remove the black background without the fire looking too bright. Color balance and levels was used to correct the fire. The background was duplicated and my hand was then masked out. The feather was changed and levels, color balance, and the blending mode "Screen" was used to make it seem as if the fire was reflecting off of it. For the desk, the elliptical marquee too was used to create an oval around the desk. Levels and color balance was used but not screen as the glow is farther from the light source and so is, in turn, not as bright. The eraser tool was used to erase areas that would be in a shadow, such as in between keys or the left side of the mouse. The fire layer was duplicated and a Gaussian Blur was added to the bottom layer to make it seem as if it was glowing.
Portfolio #3
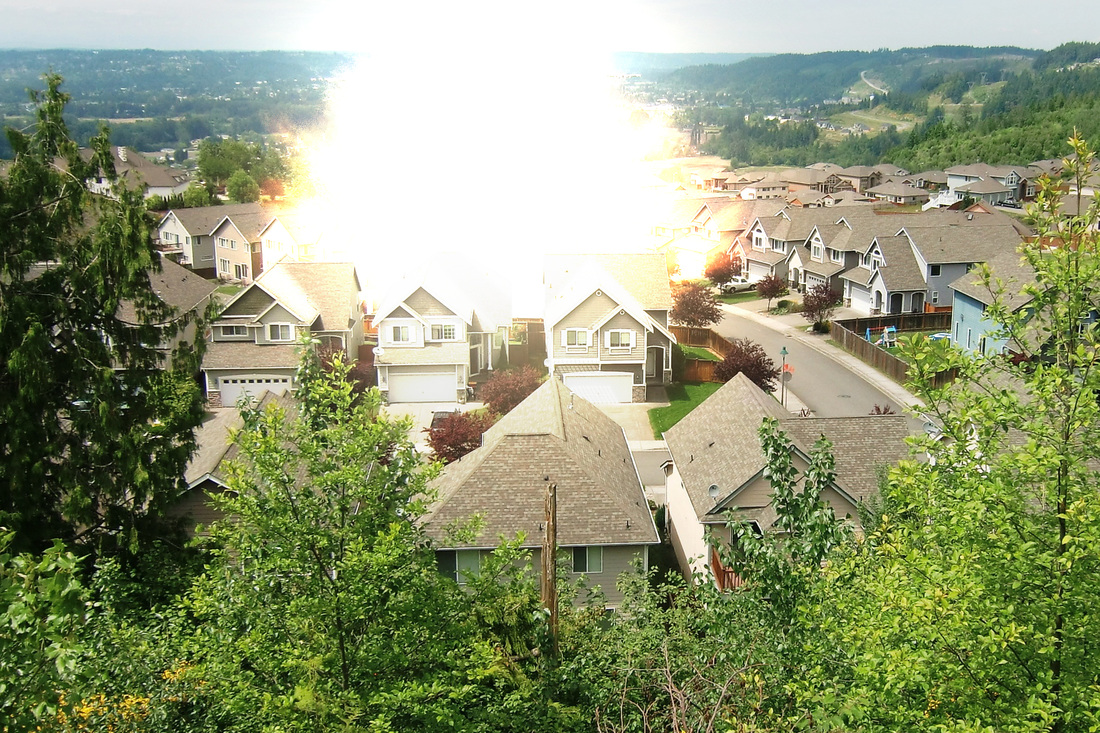
First a picture of a neighborhood was obtained. The houses in the foreground were masked out with the pen tool. Two explosion assets were: one fireball and one mushroom cloud. These assets have black backgrounds. The explosion assets were placed into the photo and the blending mode was set to "Add" to remove the black. The areas on the roofs of the houses were masked out with the pen tool. The blending mode of the roofs were set to "Add" to lighten them up. The feather of the mask was adjusted to get rid of any sharp lines. The explosion assets were merged together then duplicated. On the copied explosion, a Gaussian blur was added and set very high to get a glow effect. This layer was placed on top, further illuminating the houses. The base explosion asset has a radial blur added to it. This blur is set to give the impression of expanding fire.
Portfolio #4
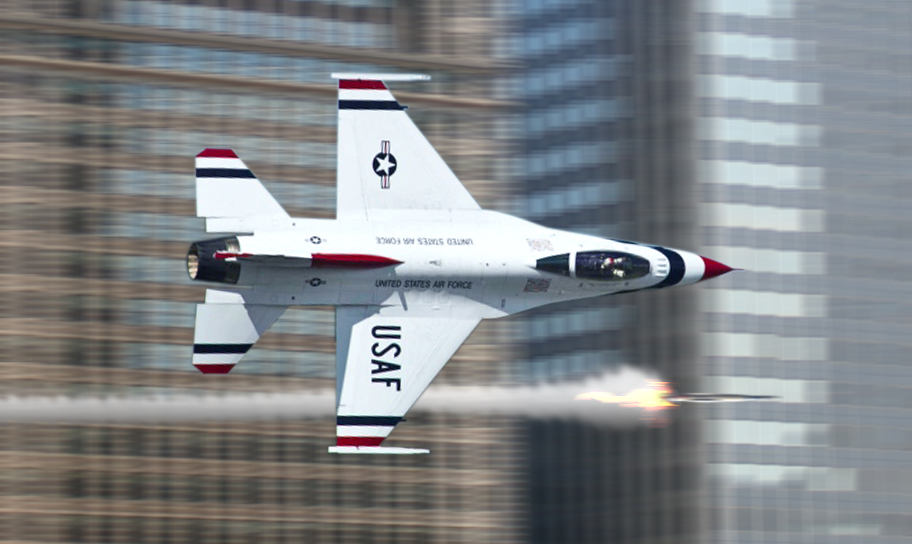
A top down picture of a F-16 was found. Also, pictures of buildings, a missile, and the same fire asset from the fire in the palm were used. The F-16 was masked out with the pen tool and the feather was set to 1 pixel to eliminate any hard lines. The picture of the aircraft was then set on top of the buildings. The building layer had a motion blur added to it to give the impression of a panning camera. The missile already had a transparent background. It was scaled down and placed to seem as if it had been fired from the aircraft. The fire asset was placed behind the missile and the blending mode "Add" was used to remove the black background. The missile and the fire have a motion blur filter to give the impression of movement. The smoke was made with the brush tool making a small white circle behind the missile. The trail was made using the smudge tool. A white to black gradient was applied to a new layer and a clipping mask was used to make the gradient in the shape of the smoke. A ripple filter was added to the smoke to give the impression of puffy smoke. The blur tool was used to soften the edges caused by the filter.
Portfolio #5
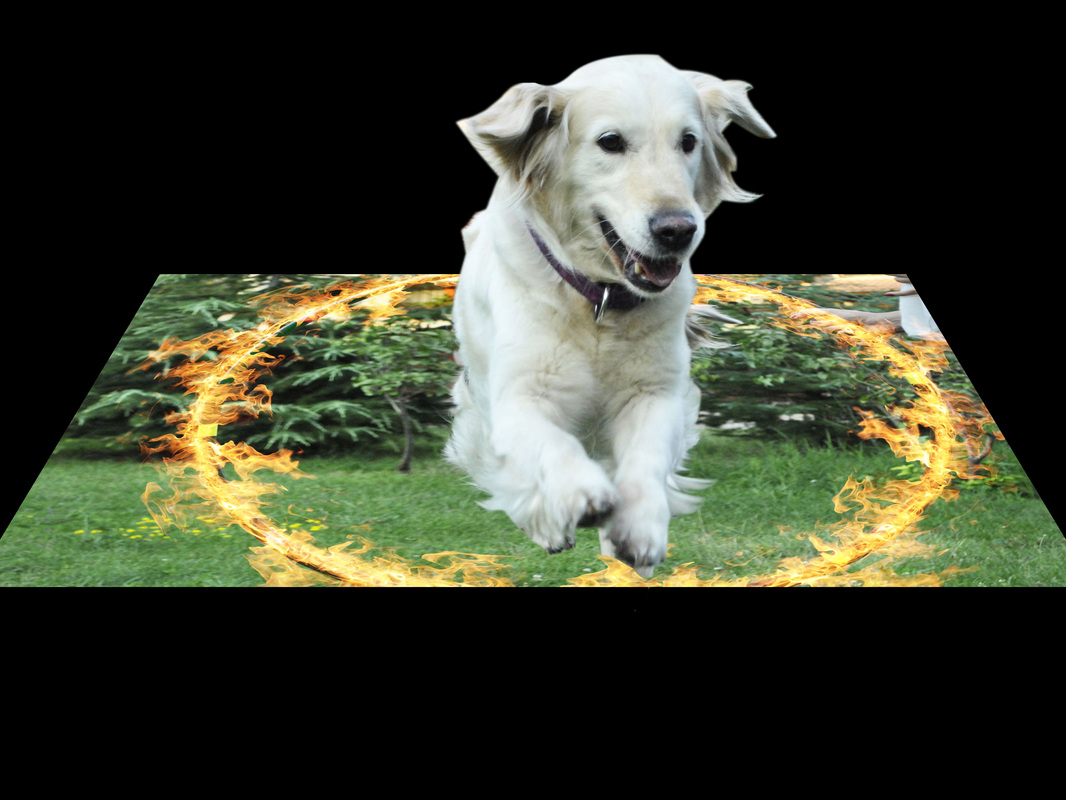
First a picture of a dog jumping through a hoop was found. A fire asset was also found with a black background. The fire assets were duplicated and placed end on end to make one really long fire trail. The fire layers were merged together. Polar coordinates were used to make them circular. Transformation was used to make it go over the hoop. The dog was then masked out. The background was made into a 3d postcard and rotated. The dog was then scaled and placed so that it looked like it was jumping out of the photo.
Portfolio #6
This effect was done completely in After Effects. First a black solid was created. The effect CC Particle world was applied to the layer. This causes objects to be generated in 3d space. A camera was added to capture this effect more. The producer was set to twirl and the gravity was set to negative so that the objects would float up. The colors were kept at default. The particle was set to the triangles and the birth rate and longevity were tweaked to personal preference. A vector blur was then added to the solid to make the triangles look like fire. Afterwards, a glow effect was added. The intensity and radius was set very high because the fire effect is very big.
Portfolio#7-8
First, a mp3 file and a black solid were added into AE. Using the generate audio waveform, the bars were created. The audio source was set to the mp3 file. The minimum and maximum frequency were set very low as to visualize the bass. The amount of bars was set to personal preference. The grey background was made using very bright orange rectangular solids. This was then exported with the alpha layer and placed into photoshop. The shape of the bars was edited using the eraser tool. The bars were then made 3d and extruded. A picture of my desk was placed underneath the layer with the bars. The camera was moved so that the bars appeared to be on my desk and the light was adjusted to match the light that was actually within the scene. This was then exported via the timeline. This new video was placed into AE. Using the wiggle expression, the shot was animated to seem as if was handheld. At the end of the video, an explosion asset was added. At the frame where the explosion covered the entire screen, a black solid was added underneath the explosion so that when the explosion cleared it would be black underneath.
First a picture of Bill Nye was found. Ken Ham's face was placed underneath. Keylight was used to remove the graph. The gain was animated so that Ken Ham's face would appear. Text was added with the font color yellow with a glow effect. Hitmarkers had a green background that was keyed out with keylight. The sound was also played when the hitmarkers were made. The picture of Bill Nye and Ken Ham was animated to move and rotate using the wiggle expression that was parented to sliders in order to change the amount easily. Motion blur was added for euphoria. A null object was animated to rotate with the wiggle expression. The triangle was parented to this then animated. For most of the effects, such as the explosions and guns and stuff were on a green screen. This was moved into position and the green was keyed out as above. A dubstep mp3 was added. To make the audio synced bars, the generate/audio waveform was used. The source was set to the dubstep and was moved into position. Blue and red adjustment layers were added. The opacity was animated with the wiggle function to induce euphoric flashing. The raining Doritos and Mountain Dew were made with CC Particle world. A new solid was created and CC particle world was added. The producer was set to jet sideways and gravity was adjusted based on preference. Next, the texture was set to the Doritos or Mountain Dew. The producer was positioned at the sides of the screen. The lens flare (which you probably didn't notice through all of the euphoria) was made with the lens flare effect. The light source was animated to go from left to right.
